My Desk Setup
One of the most important things wether you are coding or gaming (both of which I enjoy), is your actual configuration of your desk space. With me spending even more time in the same space for both my professional and personal endeavors, something more ergonomic is in order.
The Desk
I first started off “composing” my own flavor of an Ikea desk. After many hours of google searching and youtube videos, I settled on the IDÅSEN legs paired with the entry level LINNMON top, which I chose because it was 2 meters wide but also only 60cm deep. The down side is that the top is not actually intended to be mounted but it helped keep the costs down for the initial setup and I was after a nice long desk which the standard tops max out at 160. The fact the top is also basically cardboard and lighter …. increasing the weight allowance for using the standing desk mode.
The Monitor
Until recently I had been using two Acer 24 inch displays side by side which got the job done. I was however wasting my investment in my personal rig which has a Nvidia GTX 1080 packed inside, so a monitor that can only do 60hz leaves my graphics card doing nothing when playing games.
I have long had my eye on ultrawide format displays but did not have faith in what was on offer at the time. My criteria was simple, something that I could game on but also use for productivity. The vertical height was important but with only 1080 resolution, the pixel density was sub-par for my liking.
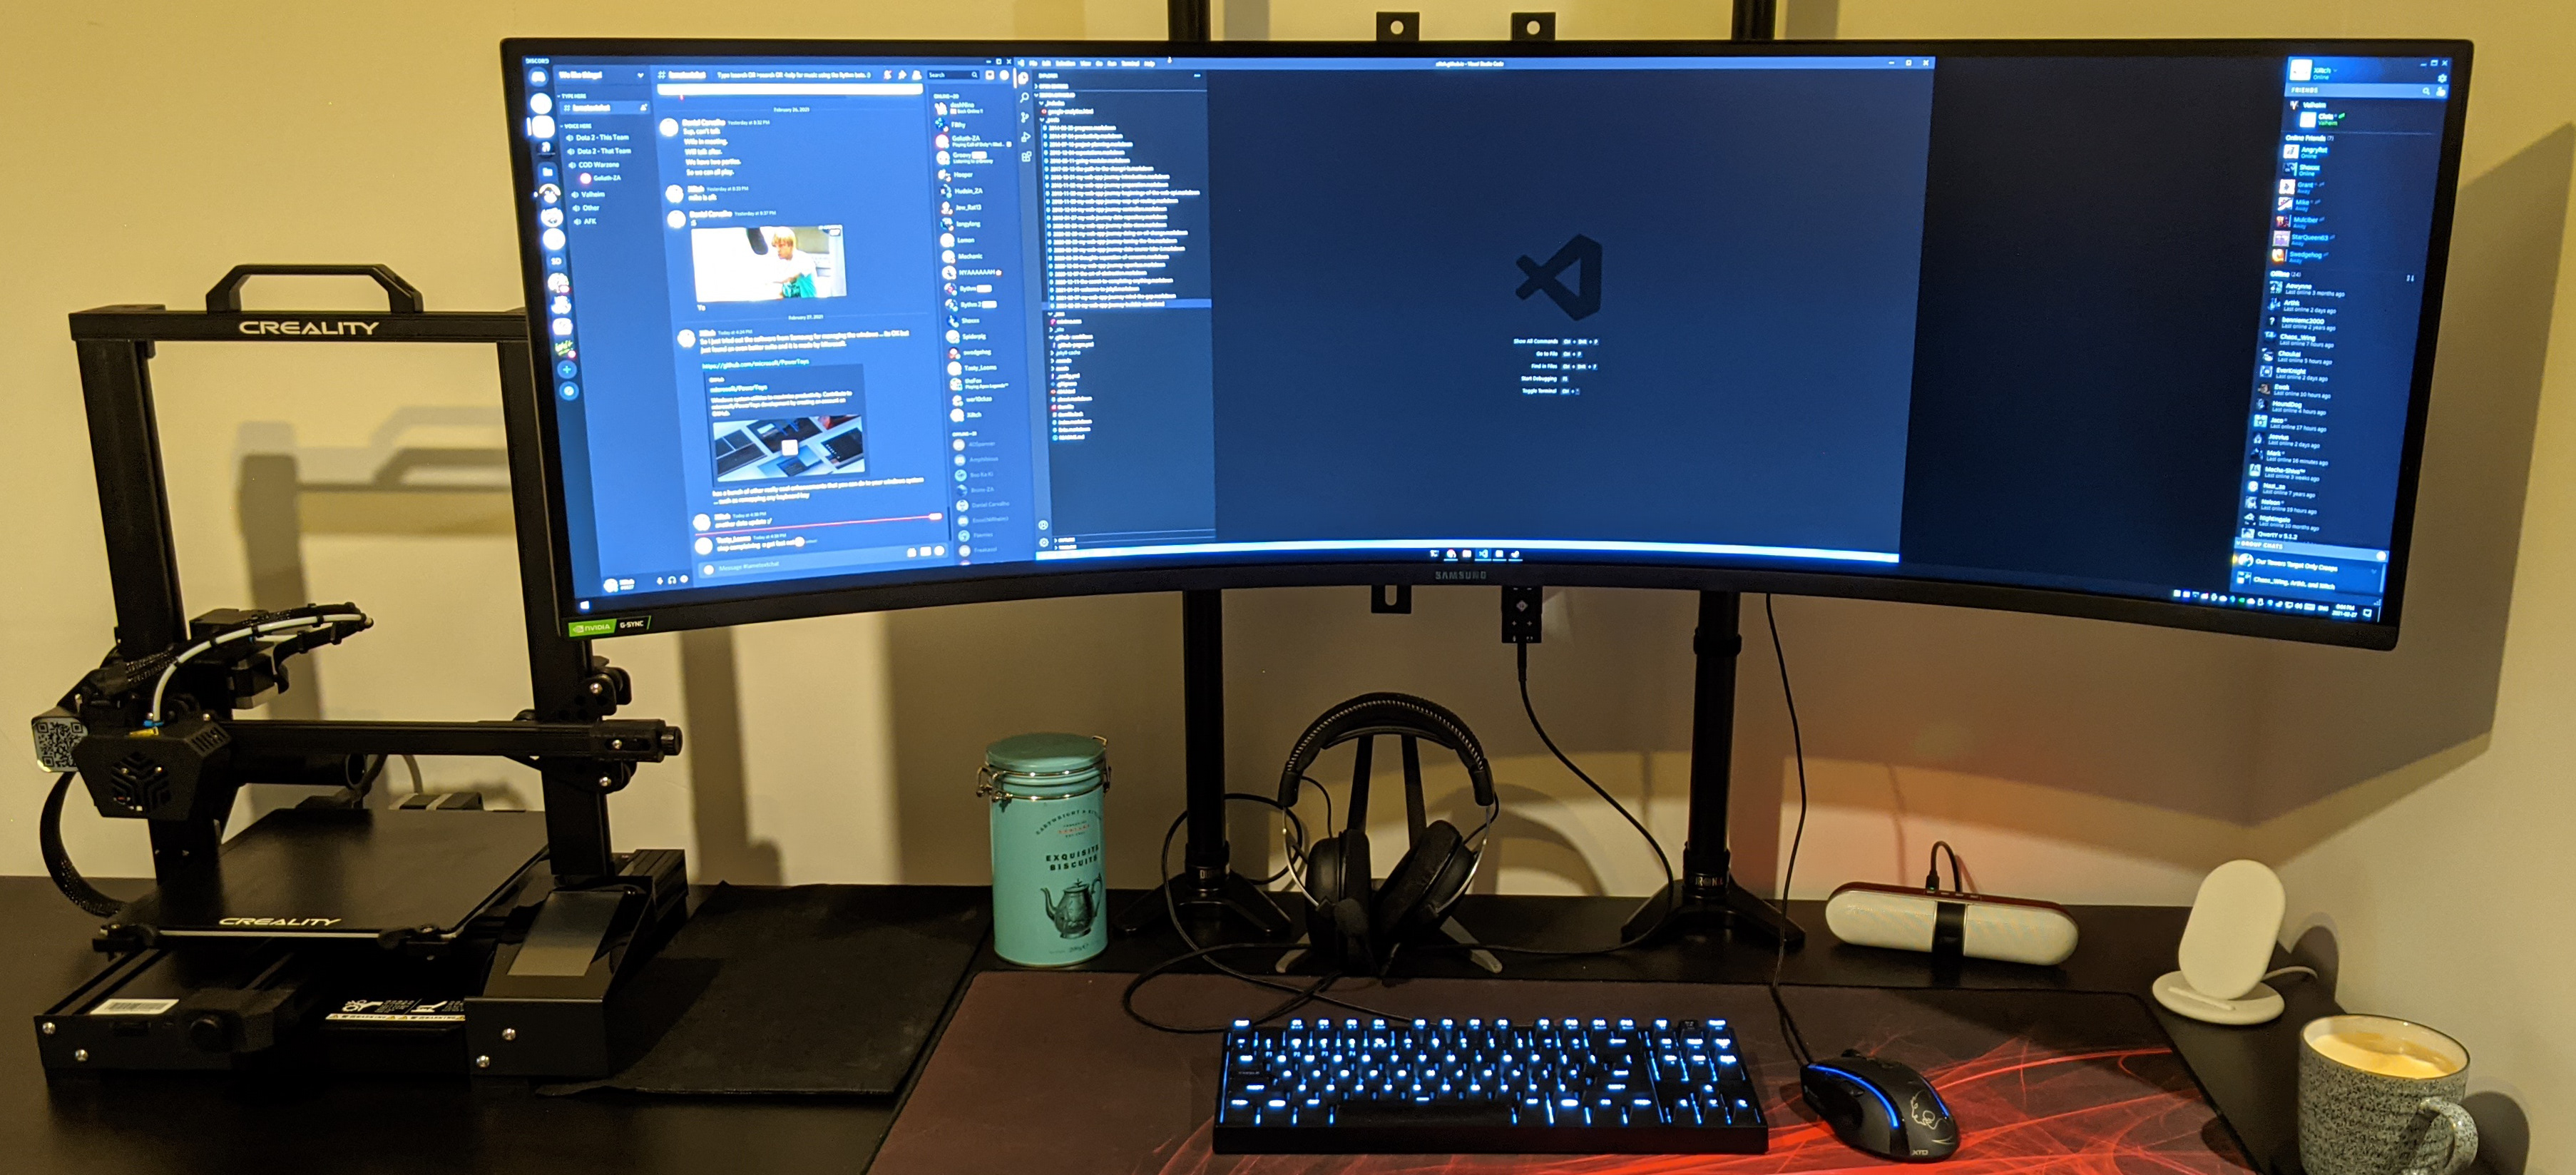
Samsung then released the Odyssey G9 which supports up to 200hz refresh rate (when using 1080) but also has a max resolution of 5120x1440 at 120hz refresh rate. The monitor is also G-Sync compatible which should work well with my graphics card.
This monitor is amazing offering deep colors and amazing contrast. Brightness is no issue and when in front, I do not see any light bleed from the top or bottom edges. Basically this monitor is the equivalent of having two 27 inch displays standing side by side without the bezel in the middle.
Ergonomics
With covid, many of us were forced into working from home. One of the first issues I experienced spending countless hours sitting at my desk was “Looking Down” at my screens. The solution at the time was to leverage the power of my standing desk and just raise it till my monitors were at eye level. The down side was my keyboard was almost at eye level as well and had me working posed like an orangutan.
When I got the G9, options became limited for raising the monitor to eye level while keeping my keyboard at elbow level. Basically you are limited to buying the Ergotron HX but then need to also buy the additional Heavy Duty Pivot. This is not so cheap and I don’t know why they don’t offer this as a configuration option to minimize wasting a perfectly good pivot.
I decided to go all DIY and build my own mounting solution. I purchased two Duronic DM 55 Mounting Poles and eventually plan on mounting them using the Grommet 2 to maximize clamping force on the flimsy LINNMON top. At the time of writing, I am using the clamps and it works just as well.
To anchor the monitor to the poles I settled on using a wall tv mount. Mounting the bracket against the poles was achieved using some couplers but I ran into an small issue of about 1mm. The couplers had a minimum diameter rating of 33mm and the poles had a diameter of 32mm. I solved this by 3D printing some bushings that match the pole diameter perfectly and was a little eager on the outer diameter. Looking back I should have settled for a slightly smaller diameter which would have made installation a LOT easier. I ran into another issue where the butterfly nuts of the coupler interfered with the tv mount bracket, so I had to find some other nuts and bolts to use for attaching the tv mount to the couplers. Another solution is using Steel Pipe Clamps which should be easier to mount around the poles to the tv bracket.
In the end I was able to position my monitor at an ideal height from the desktop and its very rigid as a result, the only negative to this setup is that I am unable to easily reposition the display. This includes any form of rotation, as well as height position. I do however suffer absolutely no wobble from the screen when using my keyboard which is definitely worth it.
Finishing Touches
With the monitor securely mounted in place, my wife was very quick to point out the issue with the cabling down the back against the white wall. First I installed a cable wire tray under the desk out of sight which makes storing a power extension plug that will move with the desk as I raise/lower it. This helps given the short power cable supplied with the monitor.
I then used the mounting poles with some [velcro style cable straps][cablestreaps] to hide the cables going up to the monitor behind the poles. I used the same cable straps to bundle the cables from the desk down to the desktop below which not only makes it look neat but when raising/lowering the desk, helps keep the cables free of “snagging” on anything.
Screen Management
Using a single screen instead of two requires some method of managing you various windows because while its is nice to have an Excel Spreadsheet full screen, you will often want to have multiple items open on your screen at a time. Windows 10 has a great default screen splitting behavior built in but is limited to only splitting your display in half.
Samsung offers a solution called easy settings box which has a few quirks but once you have your zones configured does work (kind of). I have also used another really great solution called WindowGrid which basically slices your monitor up into a grid and you basically can position a window dynamically against those grid spaces.
But then I re-discovered Microsoft PowerToys. This is a collection of tools that microsoft has identified people end up relying on for the simplest of tasks, such as managing windows on a very large desktop space. This latest iteration of the power tools is nicely integrated into windows 10 sharing the same design language that would make you think its almost part of the actual windows 10 system itself. Which brings me to Fancy Zones, this window manager is what I have been looking for. It integrates so nicely with Windows 10 and allows me to easily customize drop zones to resize a window to. It also has the functionality from WindowGrid I have enjoyed but then some more. I would however like either have some visual indication of the dimension (resolution) that a grid occupies or to manually specify the resolution of the zone. The reason for this is to make screen sharing over skype easier by dragging the target window to that zone sized for say 1080 screens.
Closing Comments
I am really happy to have my new monitor as well as having it positioned at a more suitable height. My main goal was to improve my posture for both work and gaming. My desk space is a lot cleaner and when my cats decide to walk past, they no longer get in the way as much. I have some additional upgrades to do which includes a cable spine of sorts to route the cabling from the pc case to the tabletop. I need some longer cabling and might get a USB kvm switch to avoid having to move cables back and forth between my personal rig and my work laptop.